How to Reset PASSWORD for a “LOCKED” Oracle SQL- Developer Account
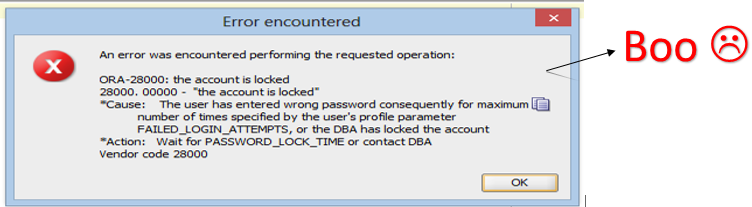
“ORA- 28000: the account is locked.”
Our mind becomes almost very restless when we have an important project to be completed within the next few hours and our Oracle DB gets locked due to attempting maximum number of incorrect password hits.
Now to unlock the account and reset the password you have 3 choices,
CHOICE 1: Wait till the LOCK_TIME is complete and then try the next maximum attempts.
CHOICE 2: Send a mail to the DB Administrator and wait till the Administrator Unlocks the account.
CHOICE 3: Follow the steps in this BlogPost
Before following the below steps, please confirm that, you have logged into your Windows OS as an Administrator.
Now follow these steps,
Step 1: Open COMMAND PROMPT
Step 2: Type sqlplus /nolog
This command helps you to log into the sqlPlus Editor.
*Note- there is a space between sqlplus and /nolog
Step 3: Enter command CONNECT SYS as SYSDBA;
This command helps you to connect to the SQL Server as Database Administrator.
Here SYSDBA is the ROLEName.
Oh wait, you are not yet connected… , SYS is the userName, now you have to enter the password to get connected
Step 4: Next Enter SYS_password
You will see the command “SQL>Connected”
Now you are the ADMINISTRATOR. So, you can control your SQL Server, which means you can control your DB Account even.
Let’s see how …
Step 5: Next Enter the following command
select username,password,account_status from dba_users;
This command retrieves the UserName , Password and Account status of all the accounts in your SQL Server.
You will also find your Oracle DB name that is “LOCKED” and the LOCK that is TIMED.

Step 6: Now our next step is to Unlock the account,
Enter alter user USERNAME identified by password;
Here my userName is AISHU. So my command goes like this
alter user AISHU identified by password;
STEP 7: Enter alter user USERNAME account unlock;
This command helps you unlock your account
You can check if your account has been unlocked by typing the command as in “STEP 5″. The Result should be as below.

Step 8: Now Open your SQL Developer.
- Right Click on your DB Name.
- Click on Properties.
- Set your DBName,UserName Password. Configure the rest of the settings.
- Click on Test. If the Test proves SUCCESS, Click on Save .
- Click on Connect to connect to your database.
Hope you are happy in unlocking your account.

nice blog… it was very useful aishwarya……
Bharathi V
May 10, 2013 at 10:23 AM
Congrats………………
Nee ellam nalla varuva.
All The best……………
Saleth Rajesh.v
May 10, 2013 at 10:45 AM
Good start! Keep up the interest and continuity!
Murali
May 10, 2013 at 10:50 AM
NIce post. Keep up the good work!
str4ng3r
May 10, 2013 at 4:57 PM
Well its a good start nice explanation on the steps. Go head
Arul Prasad
May 14, 2013 at 9:27 AM
Great Job … Keep it going !!!
rajakumartu
May 15, 2013 at 1:43 AM
Good! explained step by step….
You’re doing great, continue the good work !
RajanBabu.S
May 16, 2013 at 6:25 AM
Very Niceeeeeeeeeee !!!!!!!!!!
hariharan
May 18, 2013 at 12:27 AM
nice………………carry on………………….
a
June 1, 2013 at 11:25 PM
nice it is important to us
bhupesh
November 29, 2013 at 5:56 PM
all others steps worked successfully , but i am nit getting Sql developer ?
rohan
January 7, 2014 at 12:10 PM
Can you be still clearer with your question ?
thangaveluaishwarya
January 13, 2014 at 1:21 PM
Really helped me alot..great work… thank you..
srinivas
September 30, 2014 at 3:32 AM
Very helpful. Thankyou
Anonymus
November 5, 2016 at 12:41 PM
Reblogged this on Welcome to Achyu's blog.
Achyutananda Panigrahy
February 17, 2017 at 12:35 PM
good work happy mine is working keep it up
Serge
January 30, 2018 at 3:24 PM